


Why Is The "Air gap" Needed In a Laundry Drain And What Are The Alternatives?
Tom Lochtefeld • 26 February 2025
Laundry drainage systems must effectively handle the large volumes of water discharged by washing machines while preventing backflow and contamination. A typical setup involves a standpipe connected to a P-trap, which is then tied into the home’s main drainage system. The standpipe must be tall enough (usually 18–30 inches) to prevent overflow and positioned close to the washing machine to ensure efficient drainage. Proper slope in the drainage pipe is also critical to avoid water pooling or blockages.
Air gaps play an essential role in laundry drainage by preventing cross-contamination between the washer’s discharge and the home’s water supply. An air gap creates a physical space between the drainage hose and the standpipe or other drainage point. This gap prevents backflow caused by a clogged sewer line, protecting the washing machine and the household plumbing system from wastewater contamination. Modern washing machines often include built-in air gaps or rely on proper installation to maintain this safeguard.
Alternatives to traditional air gap setups include installing backflow prevention devices (as seen in this picture) or using standpipe extensions with anti-siphon features. Backflow preventers are mechanical valves that allow water to flow only in one direction, ensuring that wastewater cannot re-enter the washing machine. Another option is a laundry sink, where the washing machine drains into a basin before entering the home’s drainage system. This approach offers an additional layer of separation and simplifies maintenance, making it a popular choice in utility rooms or older homes.
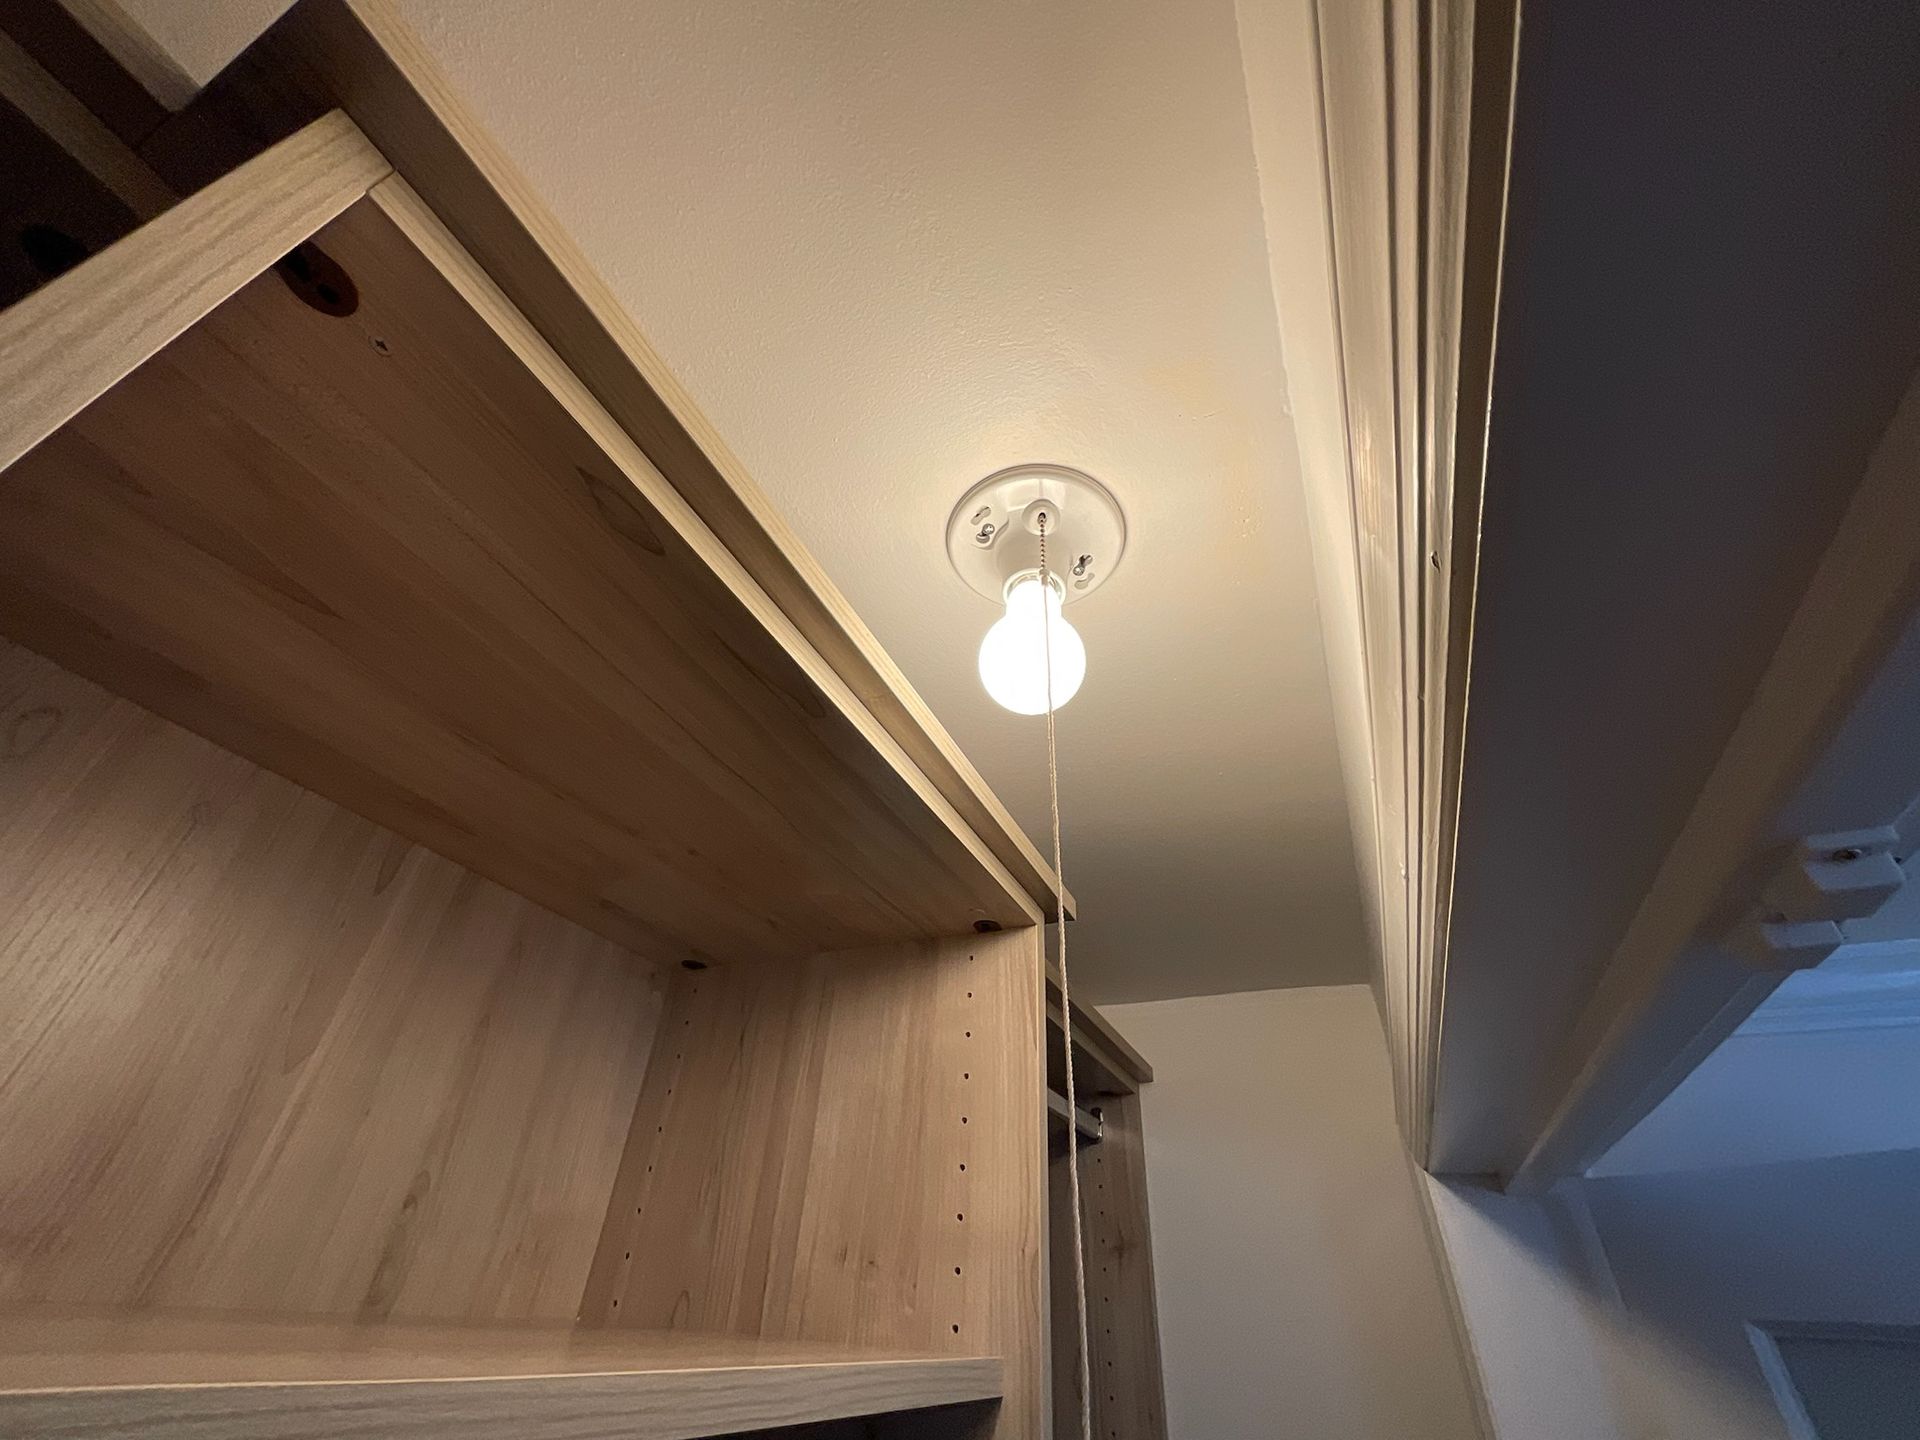
Incandescent lightbulbs, while once a household standard, pose a significant fire risk when installed in enclosed spaces like closets. During a Greenwich Home Inspection, one of the key safety concerns a home inspector looks for is the presence of exposed incandescent bulbs near clothing or storage materials. These bulbs can reach temperatures upwards of 300°F, and when surrounded by flammable items, they create a dangerous environment. At Nearwater Property Group - Home Inspections, inspectors are trained to identify these hazards and recommend safer alternatives such as LED or enclosed fixtures. A seasoned home inspector conducting a Greenwich Home Inspection will often find older homes with outdated lighting setups, including bare incandescent bulbs in closets. These setups may have been acceptable decades ago, but modern safety standards now discourage their use due to the risk of ignition. Nearwater Property Group - Home Inspections emphasizes the importance of replacing these fixtures with cooler, energy-efficient lighting that complies with current building codes. This not only reduces fire risk but also improves energy efficiency and overall home safety. Beyond the immediate fire hazard, incandescent bulbs in closets can also signal broader electrical concerns during a Greenwich Home Inspection. Improper wiring, lack of protective covers, or outdated fixtures may accompany these bulbs, prompting the home inspector to investigate further. Nearwater Property Group - Home Inspections takes a proactive approach by educating homeowners on the risks and offering practical solutions. By addressing these issues early, the home inspector helps ensure that the home is not only up to code but also safe for everyday living. Nearwater Property Group - Home Inspections, looks at these nuanced safety issues to keep your home safe.

Galvanic reaction is a critical concern during any Greenwich Home Inspection, especially in coastal environments where moisture and salt exposure accelerate corrosion. This electrochemical process occurs when two dissimilar metals come into contact in the presence of an electrolyte, such as water. The result is that one metal corrodes faster than it normally would, potentially compromising structural integrity or plumbing systems. At Nearwater Property Group - Home Inspections, identifying signs of galvanic reaction is a key part of the evaluation, ensuring that homeowners are aware of any hidden risks that could lead to costly repairs. A seasoned home inspector conducting a Greenwich Home Inspection will pay close attention to areas where copper pipes meet galvanized steel, or where aluminum components are fastened with stainless steel screws. These junctions are common sites for galvanic corrosion, especially in older homes or those with mixed-material renovations. Nearwater Property Group - Home Inspections emphasizes the importance of catching these issues early, as corrosion can lead to leaks, weakened fasteners, or even electrical hazards if it affects grounding systems. The home inspector uses both visual cues and moisture detection tools to assess the extent of any damage. During a Greenwich Home Inspection, the home inspector may also advise on preventive measures to mitigate galvanic reaction, such as using dielectric unions or corrosion-resistant materials. These recommendations are part of the comprehensive service offered by Nearwater Property Group - Home Inspections, which prides itself on delivering actionable insights to protect property value and safety. Whether inspecting a historic home or a modern build, understanding and addressing galvanic reaction is essential to maintaining the longevity of key systems and ensuring peace of mind for homeowners. At Nearwater Property Group - Home Inspections, we found this corroded pipe on a recent home inspection preventing further damage to the client's pipes as well as costly water damage.
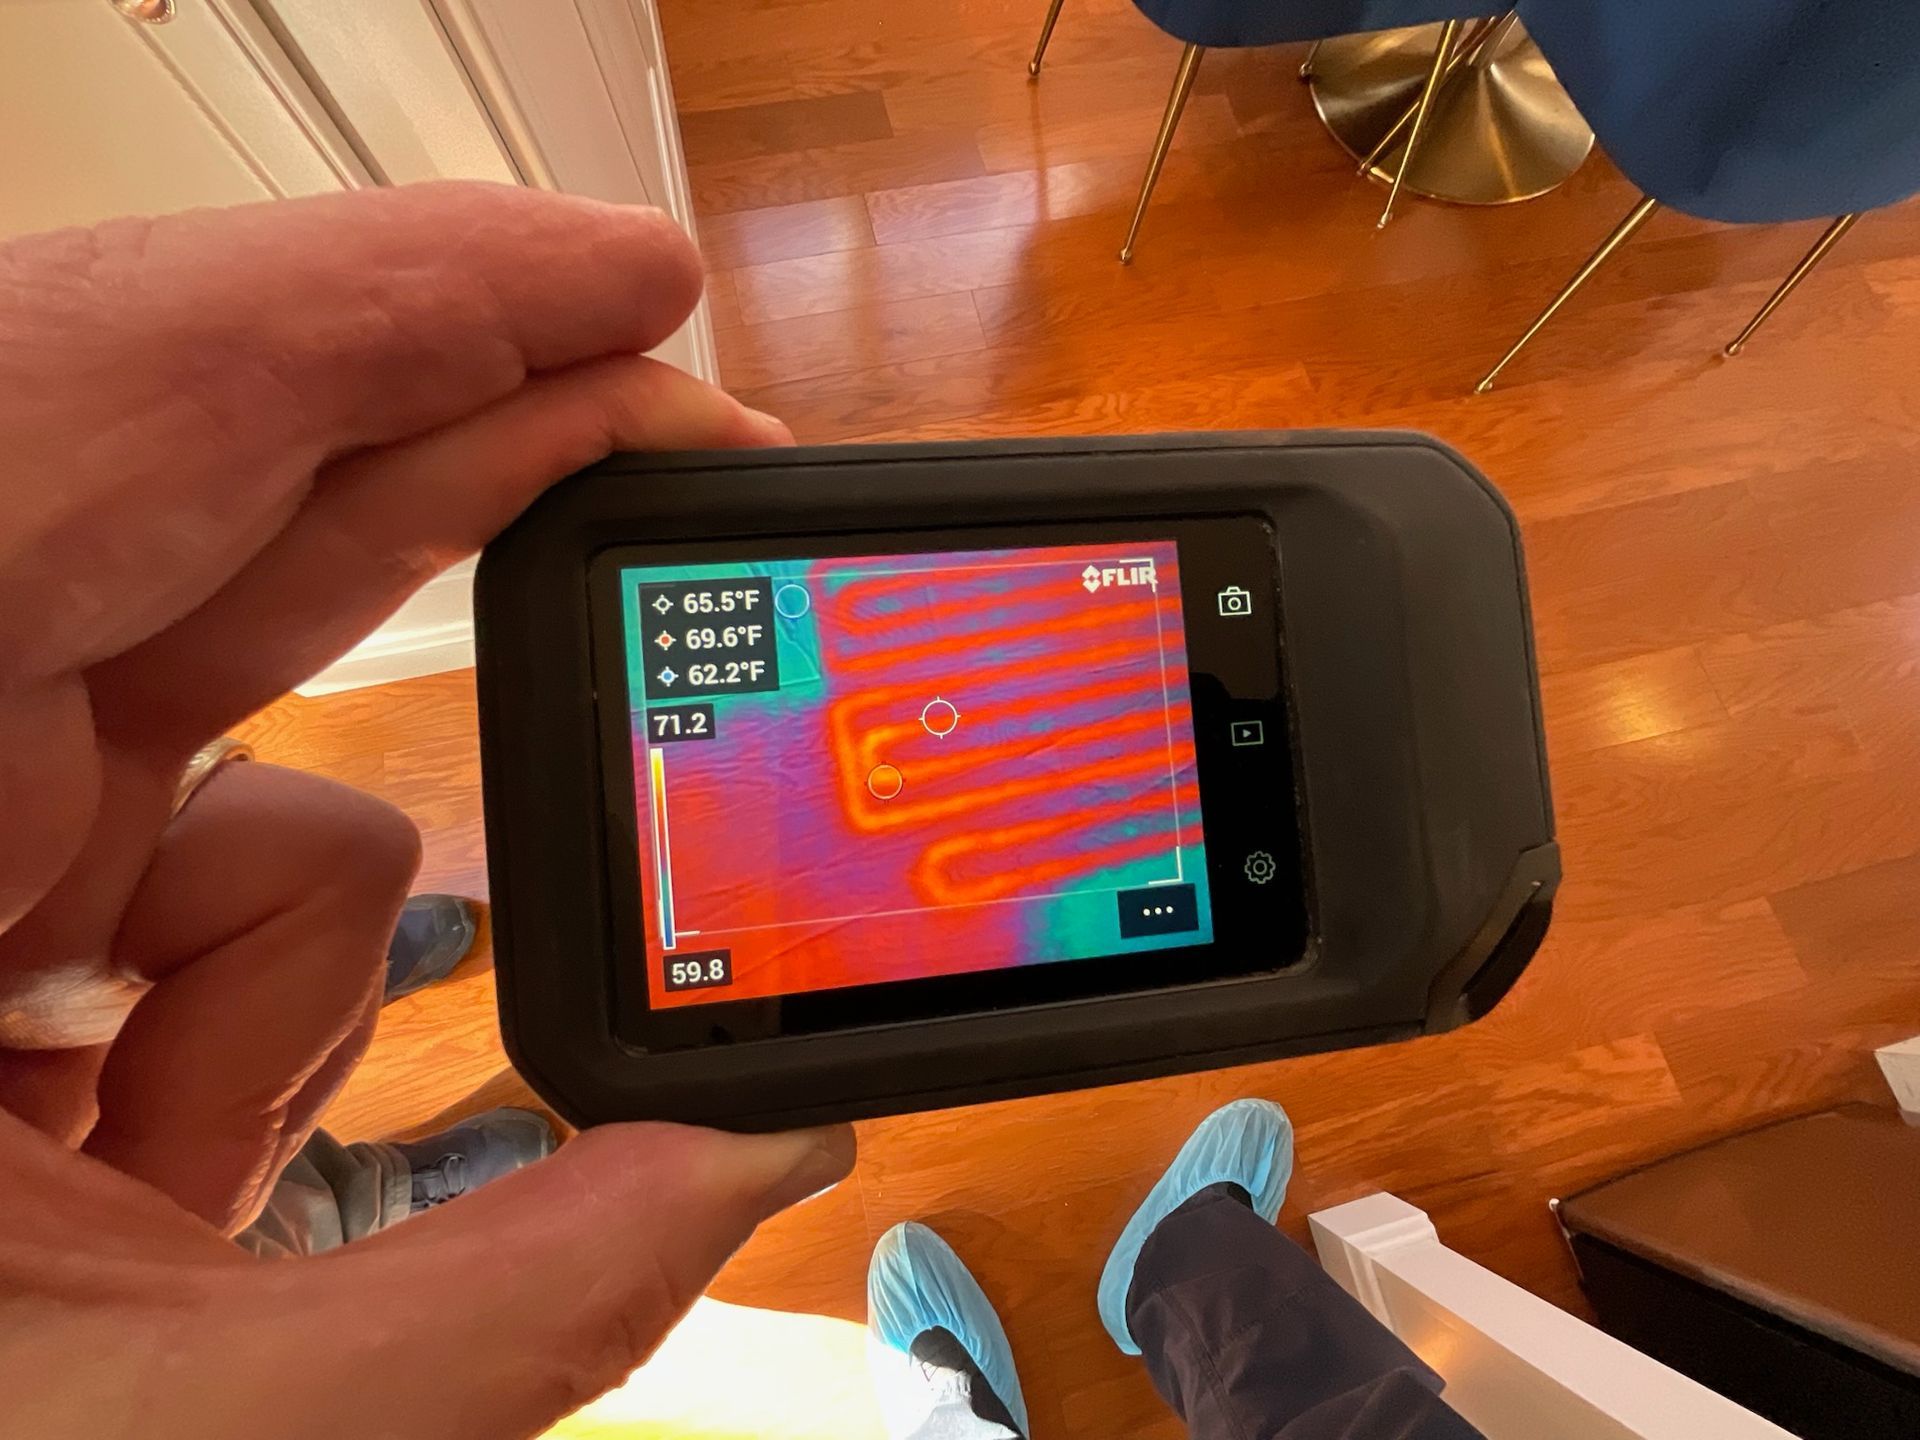
Using thermal cameras during a Norwalk Home Inspection gives the home inspector a distinct advantage in uncovering hidden issues that might otherwise be missed. These infrared devices detect subtle temperature differences behind walls, ceilings, and floors, allowing the home inspector to identify problems like moisture intrusion, electrical faults, and insulation gaps without invasive methods. By integrating thermal imaging into a Norwalk Home Inspection, the home inspector can deliver a more thorough and accurate evaluation, helping homeowners and buyers make confident, informed decisions. One particularly valuable use of thermal cameras in a Norwalk Home Inspection is detecting radiant heating systems. These systems are often installed beneath flooring, making them difficult to assess without specialized tools. A thermal camera allows the home inspector to visualize heat distribution across the surface, confirming that the system is functioning properly and evenly. During a Norwalk Home Inspection, this technique can also reveal cold spots or malfunctioning heating elements, helping the home inspector diagnose issues quickly without disrupting the home’s structure. Beyond heating systems, thermal imaging is especially effective for identifying water damage during a Norwalk Home Inspection. Moisture trapped behind walls or under floors often creates cooler areas that stand out clearly on a thermal scan. This enables the home inspector to detect leaks or potential mold risks before they escalate into costly repairs. By using thermal cameras, the home inspector enhances their ability to deliver a comprehensive and proactive evaluation, turning a routine Norwalk Home Inspection into a powerful safeguard for property health and long-term value. Does your home inspector provide thermal imaging as part of his standard home inspection? Nearwater Property Group - Home Inspections does
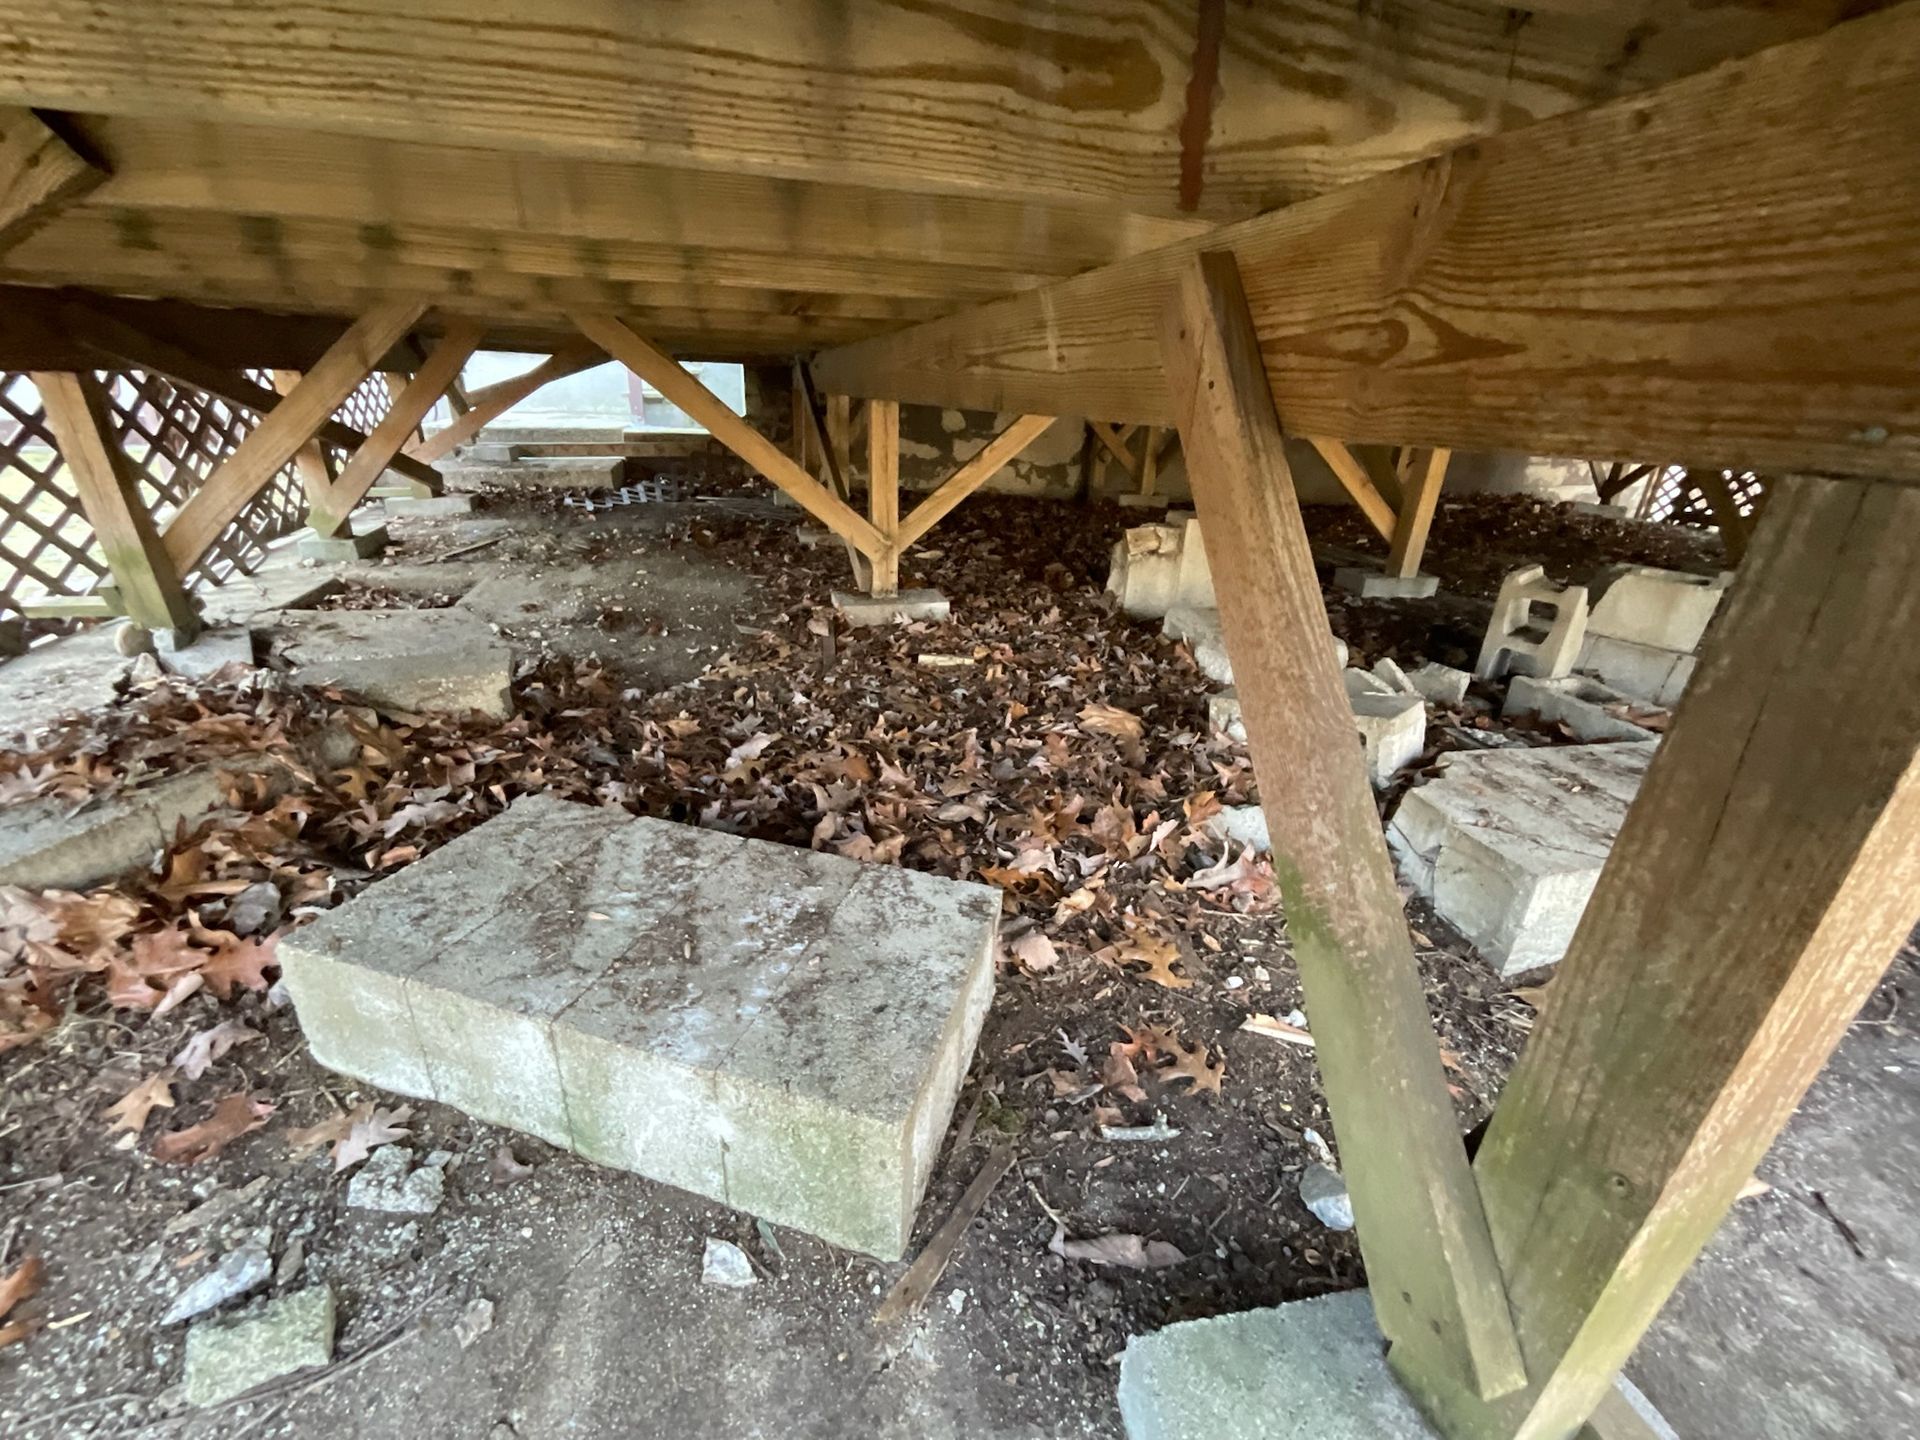
You think your deck can handle the weight of that that hot tub? Better speak with an engineer first!
The body content of your post goes here. To edit this text, click on it and delete this default text and start typing your own or paste your own from a different source.
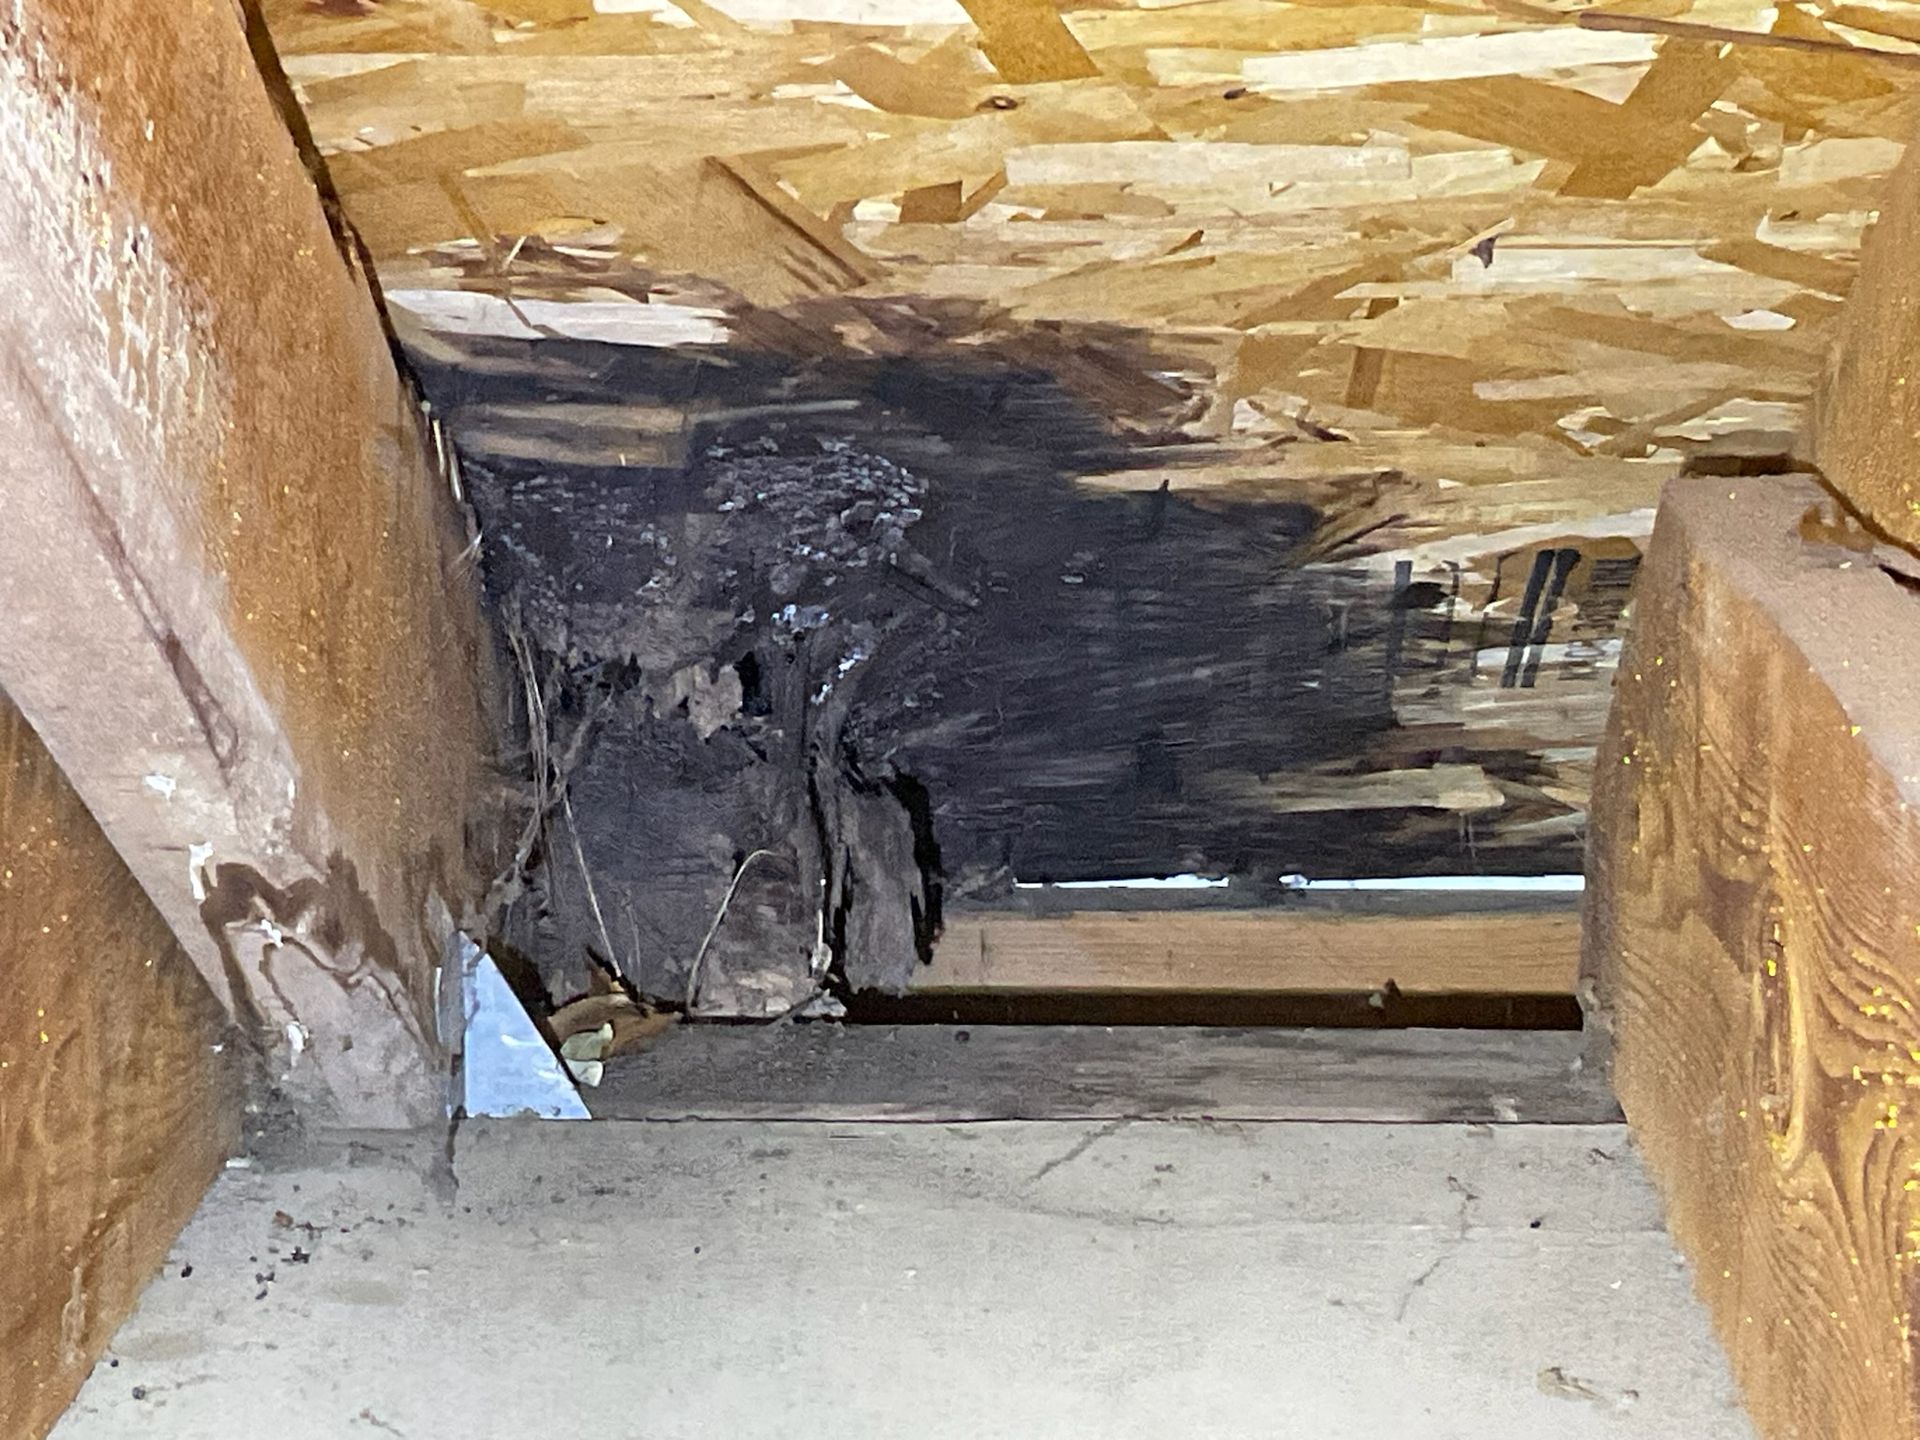
Moisture intrusion is one of the most significant threats to the structural integrity of buildings, particularly when it comes to wood components. When wood is exposed to consistent or excessive moisture—due to leaks, poor drainage, or high humidity—it creates the perfect environment for wood rot. Wood rot is typically caused by fungi that thrive in damp conditions, breaking down the cellulose and lignin that give wood its strength and rigidity. Over time, this degradation weakens structural elements like beams, joists, and framing, potentially leading to warping, sagging, or even collapse if left unchecked. Beyond compromising the physical structure, wood rot and moisture issues can also lead to broader building system failures. Moisture can spread to other materials, such as drywall and insulation, reducing their effectiveness and contributing to mold growth. Mold and mildew flourish in damp environments and can infiltrate HVAC systems, spreading spores throughout the building. These systems may also become less efficient due to the added humidity, leading to increased energy costs and difficulty maintaining comfortable indoor conditions. The health concerns related to moisture and wood rot are especially troubling. Mold spores and mycotoxins released into the air can trigger respiratory problems, allergic reactions, and aggravate conditions like asthma, especially in children and the elderly. Long-term exposure to damp and moldy environments can also contribute to more serious health issues, including chronic sinus infections and skin irritations. Because these effects often develop gradually, building occupants may not immediately connect their symptoms to the underlying moisture problem, allowing the damage to continue unnoticed. Regular inspections and timely repairs are crucial to maintaining both structural safety and indoor air quality.

High water pressure in a home might seem like a luxury, but it can actually cause serious damage over time. One of the primary dangers is the stress it puts on plumbing systems. Pipes, joints, and fixtures are only rated for certain pressure levels—typically around 60 psi. When the pressure exceeds this, it can lead to leaks, burst pipes, or premature wear on appliances like washing machines, dishwashers, and water heaters. These issues can result in costly water damage and increased utility bills. Another concern with high water pressure is the impact it has on water conservation and energy efficiency. Excess pressure causes more water to be used than necessary, increasing both water and energy costs, particularly when heating water. It can also contribute to erosion inside copper or PEX pipes, which in turn leads to sediment buildup and reduced water quality. Over time, this can degrade the effectiveness of your plumbing and create health and safety risks, especially if the pressure is not consistently monitored. To manage and prevent problems from high water pressure, homeowners should consider installing a pressure-reducing valve (PRV) on the main water line. A PRV regulates the pressure entering the home and keeps it within a safe range—usually between 40 and 60 psi. It's also wise to use a water pressure gauge to monitor pressure periodically. If signs of high pressure appear, such as banging pipes (water hammer), leaking faucets, or running toilets, it’s important to address them quickly by consulting a plumber. Regular inspections and proper pressure regulation can help ensure your plumbing system remains safe, efficient, and long-lasting.
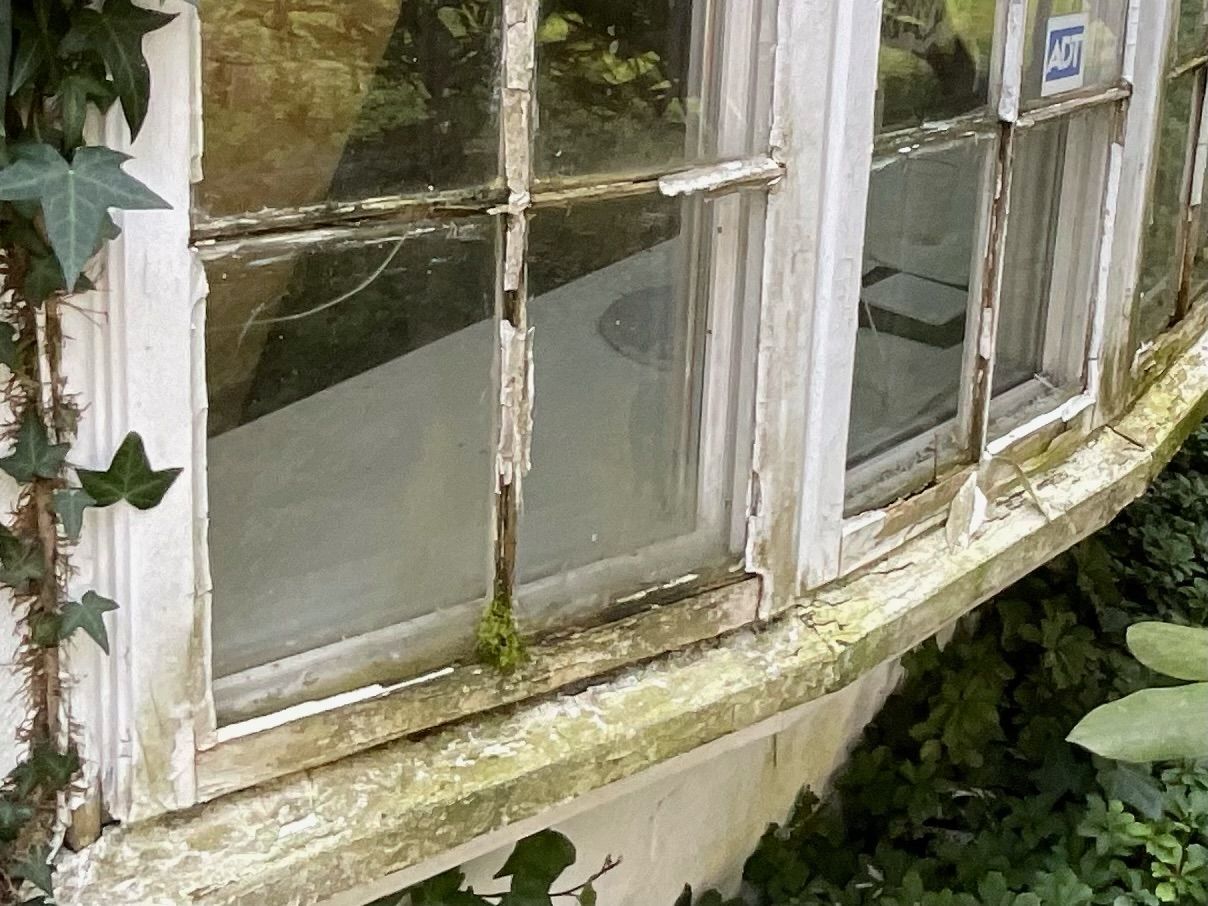
Neglecting upkeep at exterior windows - especially at the north side of your house can lead to many problems. Northern exposure for a home has its drawbacks, primarily due to the limited natural light it receives. Wooden windows don't get a chance to dry out. First comes mold and lichens, then the wood starts to rot. Rotten windows are a significant concern for homeowners. When window frames or sills become rotten, they lose their structural integrity and can no longer provide adequate insulation. This can lead to drafts, making it difficult to maintain a consistent indoor temperature and increasing heating and cooling costs. Rotten windows can also allow moisture to enter the home, leading to further damage such as mold growth, which poses health risks and can be costly to remediate. Furthermore, both northern exposure and rotten windows can negatively impact the overall value and aesthetic appeal of a home. A dark, cool interior may be less attractive to potential buyers, and visibly damaged windows can give the impression of poor maintenance and neglect. Addressing these issues by installing energy-efficient windows and ensuring proper insulation and lighting can help mitigate the downsides and improve the comfort and value of the home.
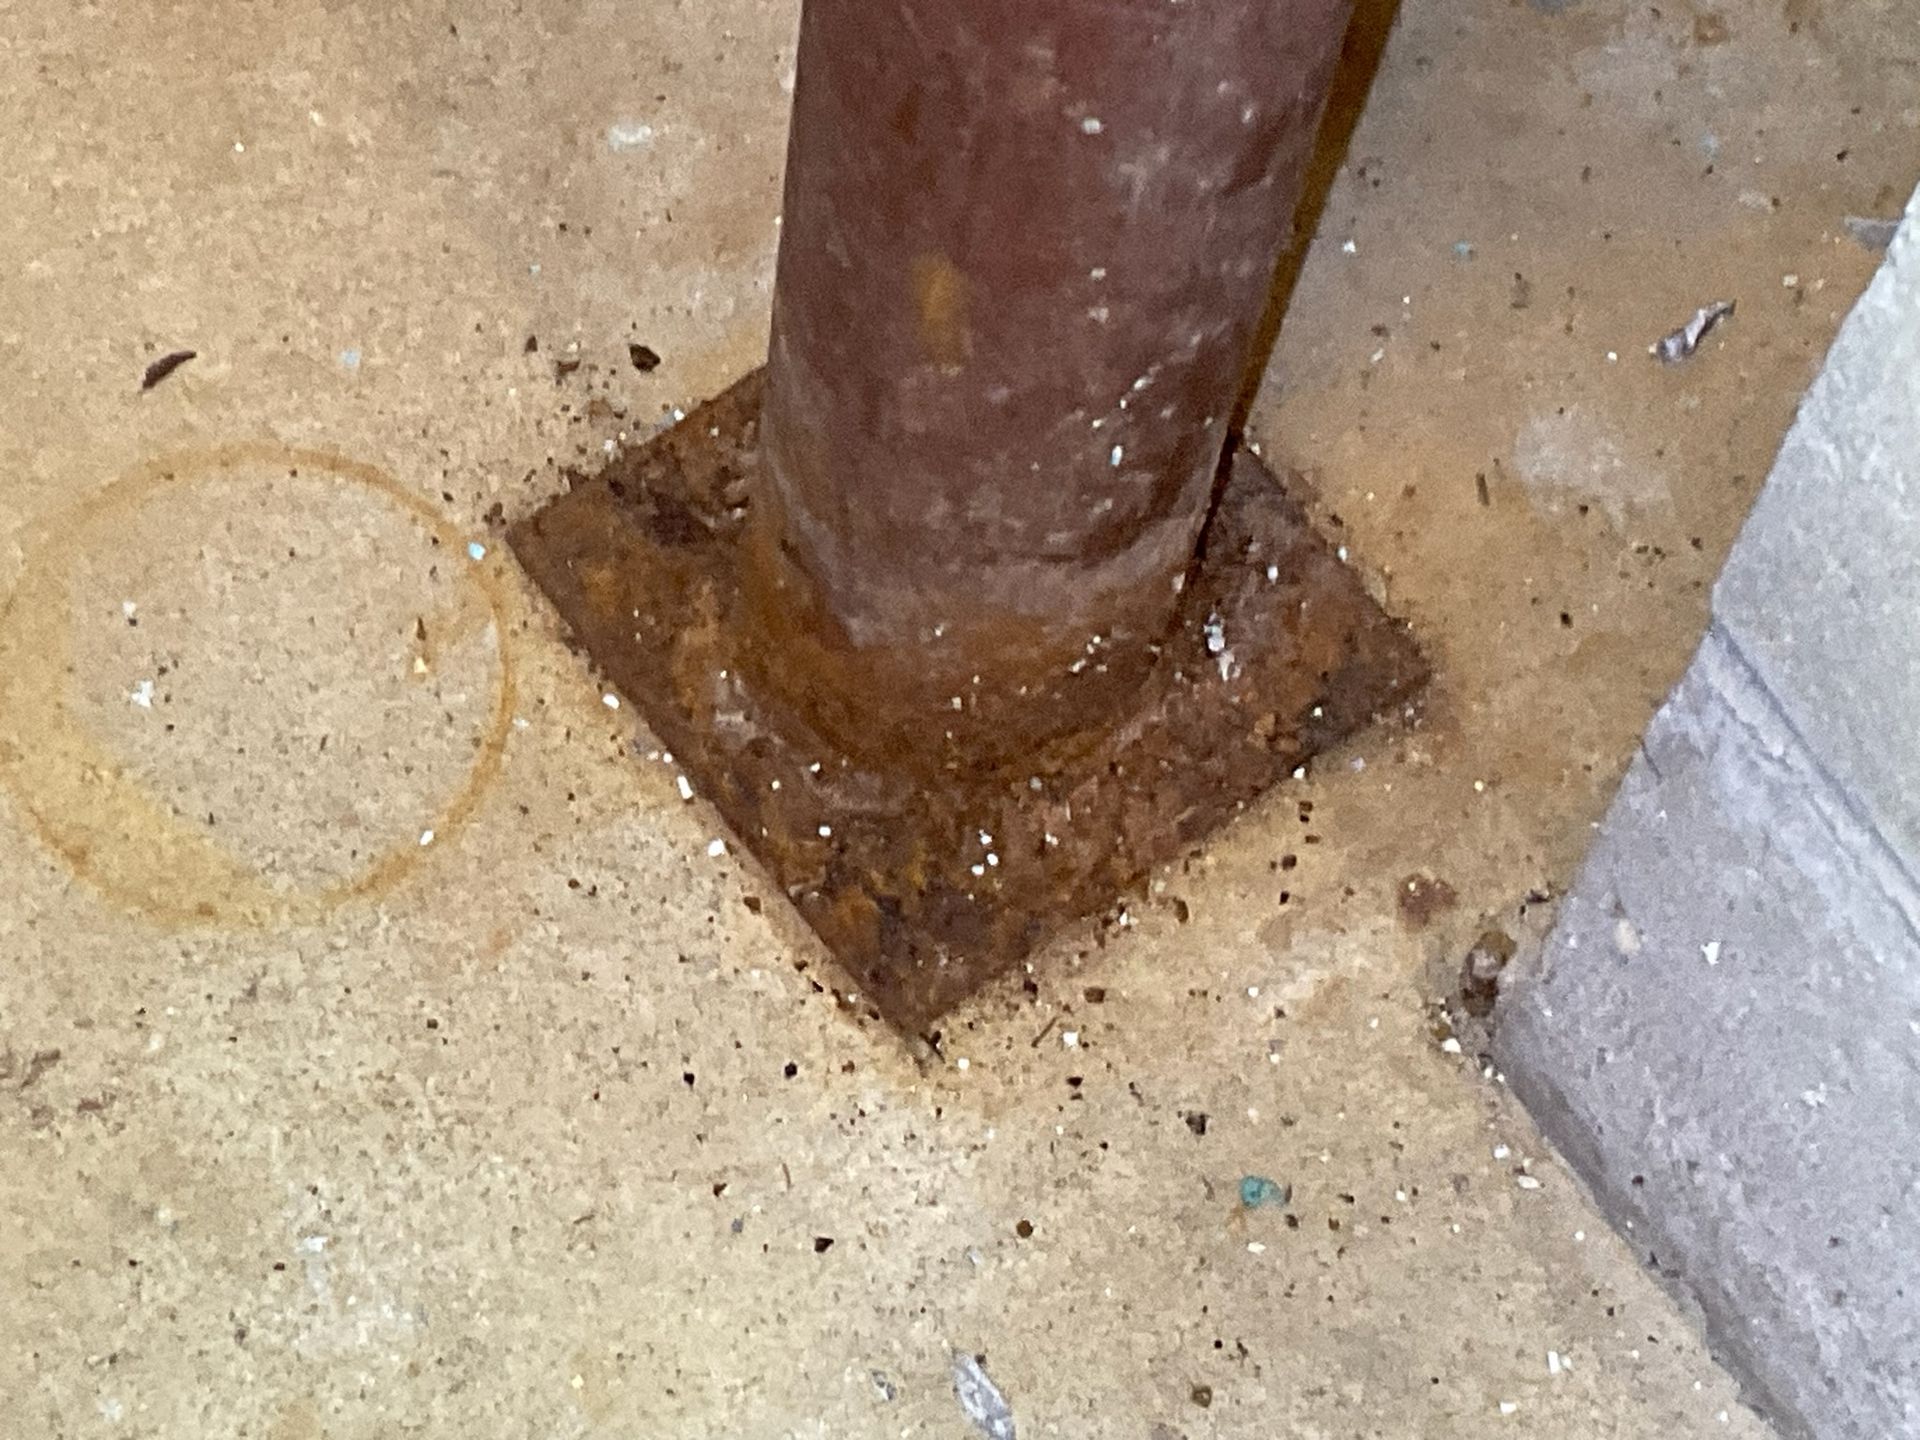
A rusty support column is often a sign of potential structural issues and should not be ignored. Rust forms when iron or steel is exposed to moisture and oxygen over time, leading to corrosion. When a support column shows signs of rust, it means the protective coating or paint has likely worn away, allowing moisture to come into contact with the metal. This corrosion can weaken the integrity of the column, reducing its load-bearing capacity and potentially compromising the safety and stability of the structure it supports. The presence of rust can also indicate that the area around the column is prone to dampness or has poor ventilation. Continuous exposure to moisture can accelerate the rusting process, causing further deterioration. In a basement or crawlspace, for example, high humidity levels, water leaks, or inadequate drainage can contribute to the rusting of support columns. Addressing the source of moisture is crucial to preventing further corrosion and protecting the structural components of your home. In some cases, a rusty support column may need to be repaired or replaced entirely. The extent of the damage will determine the best course of action. Minor rust can sometimes be treated by removing the rust, applying a rust-inhibiting primer, and repainting the column to restore its protective layer. However, if the rust is extensive and the column is significantly weakened, professional assessment and replacement may be necessary to ensure the safety and stability of the structure. Regular inspections and maintenance are key to identifying and addressing issues like rust before they become major problems.
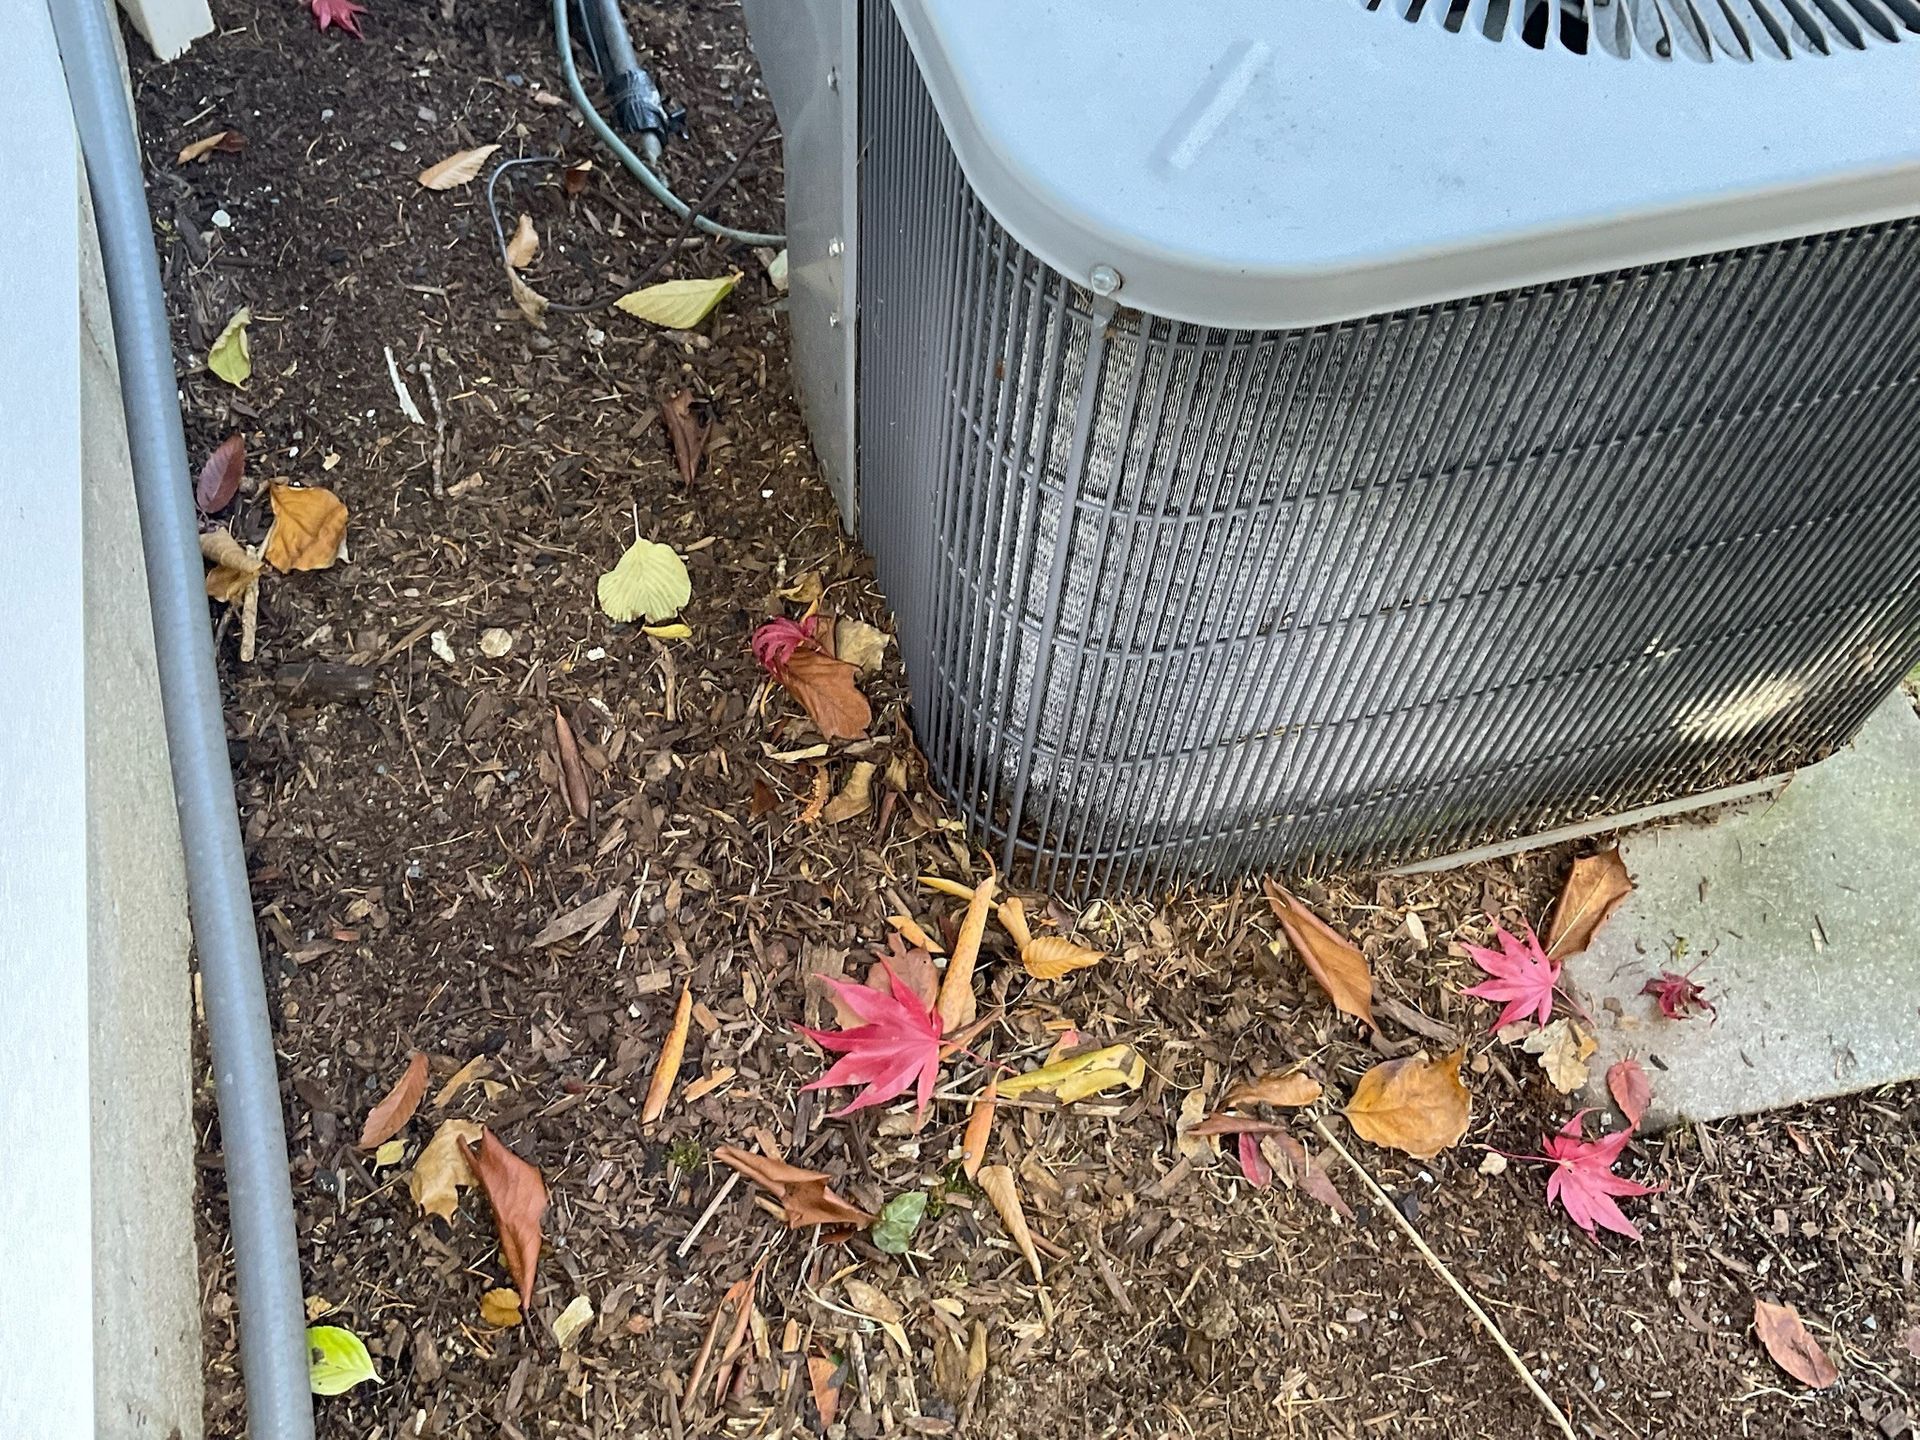
Mulch around the base of an air conditioning compressor can cause a variety of problems, primarily related to the unit's performance and longevity. One of the most significant issues is that mulch can obstruct airflow. An air conditioner relies on proper airflow to dissipate heat effectively. When mulch is piled around the base, it can block the vents and restrict the air intake, causing the compressor to overheat and work harder than necessary. This can reduce the efficiency of the unit and lead to higher energy consumption and increased wear and tear. Another concern is the potential for moisture retention. Mulch is designed to retain moisture for the benefit of plants, but this characteristic can be detrimental to an air conditioning compressor. Excess moisture around the base of the compressor can lead to rust and corrosion of the metal components. Over time, this can compromise the structural integrity of the unit and lead to costly repairs or even premature failure. Additionally, standing water or excessive moisture can create an environment conducive to mold and mildew growth, which can further damage the unit and affect indoor air quality. Finally, mulch can attract pests and insects, which can find their way into the air conditioning unit. Mulch provides a warm, moist environment that is ideal for various pests, including ants, termites, and rodents. These pests can cause significant damage to the compressor by chewing through wires, nesting inside the unit, or obstructing moving parts. In addition to the physical damage they can cause, pests can also lead to health concerns for occupants if they make their way into the home's HVAC system. For these reasons, it's best to keep mulch away from the base of the air conditioning compressor and maintain a clear, dry area around the unit to ensure optimal performance and longevity.

Burned or melted neutral wires in an electric distribution panel can be caused by several factors, with loose connections being one of the most common. When neutral wires are not securely connected, they can create resistance, which generates heat. Over time, this heat can cause the insulation to melt and the wires to become damaged. Loose connections can occur due to improper installation, vibration, or thermal expansion and contraction of the wires. Another potential cause is overloading the circuit. When too much current flows through the wires, they can overheat and melt. This can happen if too many devices are connected to a single circuit or if the circuit is not designed to handle the electrical load. Overloading can also occur if there is a fault in the electrical system, such as a short circuit or a malfunctioning appliance. Environmental factors can also contribute to burned or melted neutral wires. Exposure to moisture, high temperatures, or corrosive substances can damage the insulation and conductors, leading to overheating and melting. Additionally, rodents or other pests can chew on wires, causing damage that can result in overheating. Regular inspections and maintenance can help identify and address these issues before they lead to serious problems.